Dates & Times
Problem solved: Describes how Jetty thinks about dates and times, which are the central dimensions of planning.
Description: Throughout the Jetty platform, there are numerous places to input dates and times. There are two things to remember when working with these dates and times in Jetty:
- (Almost) everything has a start date/time and end date/time. The exceptions are certain deadlines with only a single date.
- Work with the actual date and time. For instance, take something that starts happening late evening Friday July 1 at 22:00 hrs and then goes on for three hours. This event will have a start date/time: July 1 22:00 and an end time July 2 01:00.
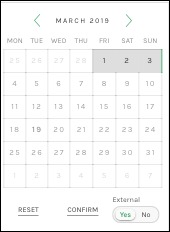
Setting a date is done in the date selector. There are two kinds. ‘One Date’ selector is used for deadlines or Check In in the accommodations tab (see Accommodations). The other date selector is called ‘Date Range Select’ and is used everywhere else on the platform. In a ‘One Date’ select, users only need to click the date wanted. In the ‘Date Range Select’, users must click twice. This is because the first click provides the start date, and the second click provides the end date. If start date and end date are the same, then users still must click the date twice. If not, it creates an activity that has a start but never ends. To select a date range, simply click the start date and then the end date. You will notice green lines indicating the start and end range.
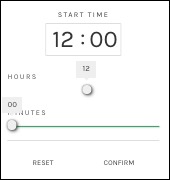
The next step is to use time selectors, which are normally Start Time and End Time. Use these to set the scheduling desired, and click Confirm. To wipe the current selection(s), click Reset.
Notice in the picture above that the ‘Date Selector’ can have a switch named External. Setting this to Yes will enable the scheduling that was just created to be spread externally. For example, this is the case in the link Info to Artist & Crew.
Note that the day begins at 00.00 hrs and ends at 23.59!
Available fields: Self evident.
See also: